Simon Say Stamp - Christmas Cookies Embossed Card
- Keisha Diann
- Nov 30, 2021
- 3 min read

Hello Lovelies! Yep, it will be DieCember in a couple of hours but I STILL can't get over the Embossing folders in the Handmade Holiday release!
I have one more technique to share, this time using the Christmas Cookies Embossing Folder and it is super quick and easy!

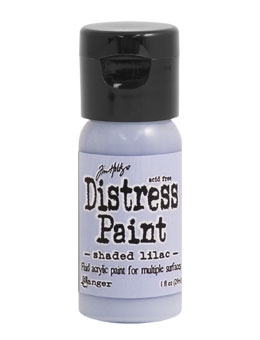
I know that this embossing folder is all about yummy Christmas Cookies, but I wanted to do something a little different here that still showcased the festive motifs that make make this design gorgeous! So instead of blending ink, I dug out my Distress paint and blended them across this embossed card front.
This wont take you very long, but let's grab a quick visual of our key supplies.
Click here to view the full supply list or check out the one linked in the gallery at the bottom of this post when you have finished exploring this card.
Let's get painty!
CHRISTMAS COOKIES CARD - Embossed and Paint-Blended Cardstock, Accented with Diecuts
Card Base: 4 1/4" x 5 1/2"
Card Front: 4" x 5 1/4"
Featuring:
Tim Holtz Ranger Distress Paint - Milled Lavender, Shaded Lilac, Salvaged Patina
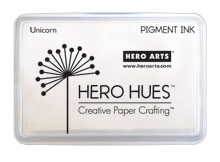
Hero Arts Hero Hues Pigment Ink - Unicorn

CARD-MAKING STEPS
Emboss an A2-sized piece of White Heavystock (or Mixed Media Cardstock) for your card front using the Christmas Cookies Embossing Folder
Squeeze a pea-sized drop of paint (start from the top with Milled Lavender) onto the foam pad (regular or Domed) of a Ranger Mini Ink Blending Tool and blend in gentle circular motions from the top of your Heavystock card front
Repeat with the following two colors using separate foam pads for each and going back over where the colors "meet" to achieve a smooth look. Set aside to dry when complete
Prepare your diecuts. The top layer of the "Joyful" sentiment is cut from white cardstock that has been ink-blended using Milled Lavender Distress Ink. Tie a little strip of turquoise ribbon around the neck of the Dancing Deer diecut
Use the turquoise foil and a laminating machine to foil the "Holiday Blessings..." Sentiment Strip and then pop up with foam tape
Highlight each of the cookies on the paint-blended, embossed card front using the white pigment ink. I applied the ink with my finger and a small paintbrush
Adhere your diecuts and sentiments to the card front as shown and embellish with jewels/rhinestones
The white pigment will mellow a bit on the lighter part of the card, but it's totally worth it to have this subtle definition!

The ribbon is just looped around the deer and secured with a knotted piece of twine. :-)

The magic sheen of the foil is hard to capture in a photo, but makes such a statement in person!

All done!


Lovelies, hopefully I lived up to my promise of a quick rundown of this card! Blending with paint produces somewhat similar results to blending with Distress Oxides, but I want to compare the two at some point in time to see what the results are. Let me know in the comments if you have done this and what you found out.
See you soon!
SUPPLIES:
I listed the products that I have used below. Please note that these are compensated affiliate links used at no cost to you. I really appreciate your support. All stamps used today were part of my maker package from Simon Says Stamp. Click on the icons below each product picture to shop with SimonSaysStamp.com.


This is so pretty ... gorgeous colours
Beautiful card Keisha. Never thought of using paints instead of ink to blend a background with. I have some gorgeous metallic paints and think I will try that. Thank you so much for sharing your beautiful inspiration, stay safe and have a wonderful day.
I love this! My fav part is the reindeer's scarf. 😁