

Simon Says Stamp - BILLOW BUTTERFLY Two-fer Cards
- Keisha Diann
- Jun 26, 2023
- 3 min read

Hello Lovelies! A Two-fer opportunity when making cards doubles your fun and reduces waste. Also, when it utilizes a background that did not work for another project, you clearly have a WINNER!
The Billow Butterfly Panel is perfect for giving you a 2 for 1 chance to make pretty cards and is also great for setting up a Shaker card with low effort.

I tend to make batches of background panels and also keep my some that I created for a purpose that did not work out. I am always surprised when I find the right moment for those pieces to shine.
Now let's take a look at today's key supplies.


Click on the image below to check out the ENTIRE release or SHOP THIS CARD in the Supplies section at the bottom of this post:

Today's GIF!
This is clearly cause for a celebration!
Like this card and my corny GIFs? CLICK BUTTON BELOW
to sign up for blog updates:
THINKING OF YOU CARD - Die-cutting and Shaker Card
Card Base: 4 1/4" x 5 1/2

COLOR PALETTE
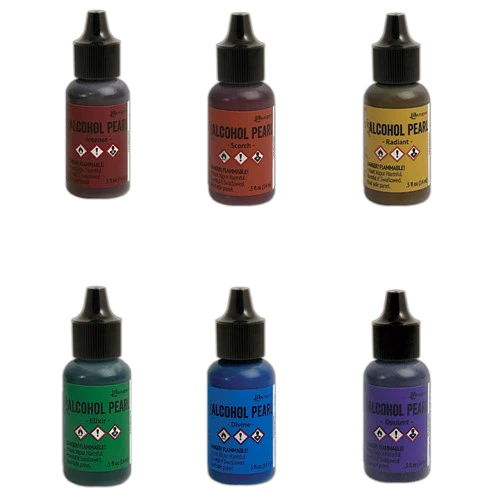
I made my messy rainbow with splotches of Alcohol Pearls Inks - Intense, Scorch, Radiant, Elixir, Divine and Opulent. You can do the same or you can ink-blend, use paint or whatever coloring medium will allow to get intense color down quickly on your background.

BACKGROUND PANEL (rescued from my stash)

PICTORIAL GUIDE
DIE-CUTTING
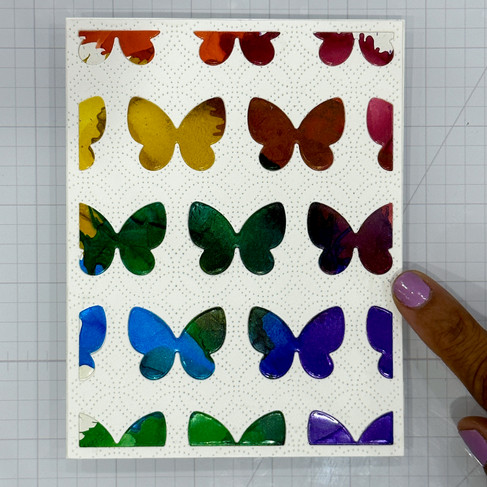
Die-cut the rainbow-inked panel using the Billow Butterfly Die.
Two words: SAVE EVERYTHING!


DIE-CUTTING and EMBELLISHING
Adhere 1/8" double-sided tape to die-cut panel
Peel off tape backing and adhere 4 1/4" x 5 1/2" acetate panel
Adhere 1/8" strips of foam tape around the edges of the panel as well as in the sections shown
Fill sections with sequins


Place card base on top of butterfly/sequin panel and add "thinking of you" die-cut sentiment from the Folksy Cats Stamp set to finish.

Can I be in love with my own card??? LOL, I love that the sequins are separate here, I think it allows them to standout more.

The intense colors somehow work a lot better now that they have all the die-cut butterfly openings.

Chef kiss???
SO HAPPY FOR YOU CARD - Die-cutting and Inlays
Card Base: 4 1/4" x 5 1/2

PICTORIAL GUIDE
DIE-CUTTING
Use the Billow Butterfly Plate to die-cut a piece of white cardstock, remove the butterfly pieces and die-cut this while background again using the Detail Ringlet Plate.

Inlays
Fill in the opening with the corresponding butterflies in the order of the original panel.


Stamp So Happy for You sentiment from the Folksy Cats Stamp Set in Citrine ink and emboss with clear powder to give it a touch of dimension.
Adhere inlaid panel to card base and finish with die-cut sentiment and yellow sequins.
Can I be in love with my own card??? LOL, I love that the sequins are separate here, I think it allows them to standout more.
The white textured background calms down and somehow compliments the intensity of the butterflies.

That embossing somehow looks soft and puffy!

Butterflies and Rainbows for the win!
Last look!
Lovelies, I am sending to your scrap/reject file to rescue one of your backgrounds and give this a try!
Happy Crafting!
SUPPLIES:
I listed the products that I have used below. Please note that these are compensated affiliate links, used at no cost to you. I really appreciate your support. All stamps used today were part of my maker package from Simon Says Stamp. Click on the icons below each product picture to shop with SimonSaysStamp.com.
Kaiser OTC benefits provide members with discounts on over-the-counter medications, vitamins, and health essentials, promoting better health management and cost-effective wellness solutions.
Obituaries near me help you find recent death notices, providing information about funeral services, memorials, and tributes for loved ones in your area.
is traveluro legit? Many users have had mixed experiences with the platform, so it's important to read reviews and verify deals before booking.
I love when I'm reminded to pull out my "sitting in the corner waiting to be used again" supplies. I love blending alcohol inks and haven't used them in a while - this gives me the perfect reason to pull them out!