

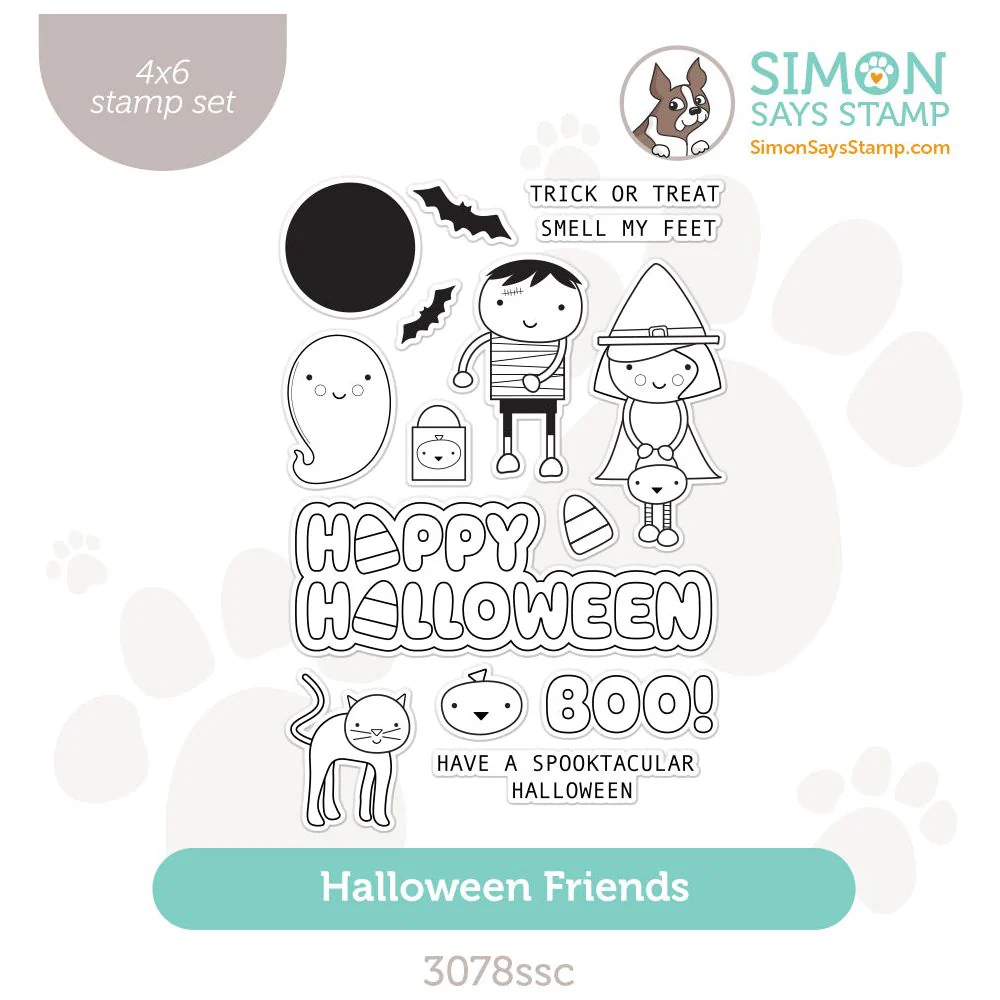
Simon Says Stamp - HALLOWEEN FRIENDS Interactive Card
- Keisha Diann
- Aug 13, 2024
- 3 min read

Hello Lovelies! Apparently my Halloween is going to be very bright and colorful this year, but honestly I'm more focused on the SUPER EASY "interactive" element of this cute Halloween Friends card from Simon Says Stamp, which allows you to fold this flat for mailing!
I'm always whining about my struggles with coloring, but I enjoyed this project as I kept the colors very limited, and so I didn't stress myself out selecting a palette. I was also super excited trying out Picket Fence Studio's Pouncers on the delicate Web stencil! Why didn't you guys tell me about these??? For once I didn't wreck a dainty stencil with my over-zealous ink-blending.

Time for Key Supplies!


Get Your Supplies!
Click on the image below to SHOP THE ENTIRE release OR
SHOP the Supplies section at the bottom of this post

Today's GIF!
I definitely love the LOOK of Candy Corn, but I'm still working on embracing the taste! :-)
Like this card and my CORNy GIFs? CLICK BUTTON BELOW
to sign up for blog updates:
HALLOWEEN FRIENDS INTERACTIVE CARD - Stamping, Alcohol-Ink Coloring, Die-cutting, Creating a Pop-Up Card Base, and Pouncer Stenciling
Card Base:

COLOR PALETTE
STENCILED WEB
Pawsitively Saturated Ink Pads - Sunbeam, Citrine, Mandarin

STAMPED IMAGES
Copic Markers - CO, C1, C3, C5, E57, E55, E53, Y06, Y08, Y35, YR04, YR18, RV55, RV52, RV00

KEY TOOLS
POUNCERS
We'll use Pouncers for stenciling the background.

SIMON SAYS STAMP DETAIL ROUND BRUSHES
We'll create our interactive element just using a Score Board and Bone Folder

PROJECT WALKTHROUGH
STENCILING
Position 6" x 6" cardstock on top of a Grip Mat.
Adhere the Web stencil over the cardstock as shown to hold in place.
Starting with the Sunshine ink, gently pat ink onto the cardstock using the pouncer, do not rub.
Continue until you achieve even coverage and the colors blend together.


STAMPING, COLORING & DIE-CUTTING
Stamp the Halloween Friends images onto white cardstock using Memento Tuxedo Black Ink. NOTE: I stamped and colored images from two stamp sets at once because I am lazy and this wastes less paper and makes coloring more convenient for me. :-)
Color with the selected Copic Markers. Refer to the close- up for details on coloring the Halloween Friends.
Align and adhere the matching dies over the images to cut out.


(look closely, the actuall die-cut is on the right!)

Die-cut the bats twice each out of some yellow and orange cardstock.

CREATING THE INTERACTIVE ELEMENT - POP-UP BASE, PART 1
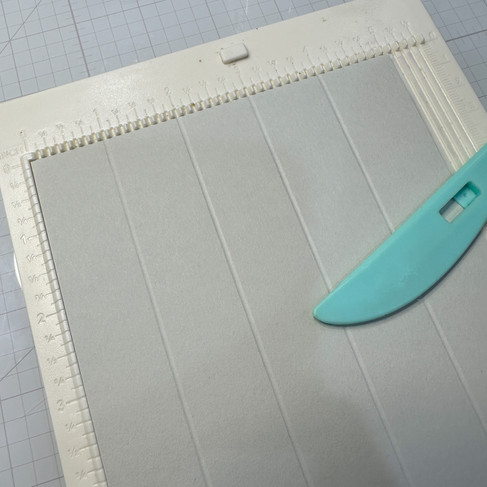
Trim two pieces of Fog Cardstock to 5" x 5 1/2".
Score the cardstock 4 times along the 5" side at 1" intervals.
For each cardstock piece, use the Bone Folder to crease each of the score lines and fold until you have created a "square tube".
Adhere the two ends of the "tube" together using Craft Glue.


CREATING THE INTERACTIVE ELEMENT - POP-UP BASE, PART 2
Place Craft Glue along one side of the completed tube.
Adhere to the bottom of the _______ card base as shown
Repeat for the other tube as shown.
Trim the stenciled Web background to two pieces measuring ~3/4" x 5 1/2" and 4 1/4" x 5 1/4".
Adhere the stenciled pieces to the card base.
OPTIONAL: To further increase the stability of the base, trim pink glitter cardstock and chipboard to 2 1/8" x 5 1/2". Adhere together with craft glue and then adhere the entire piece to the bottom of the interactive card base.


EMBELLISHING THE CARD BASE
Arrange the die-cut images on the background and cover with Glad Press N' Seal and press to temporarily adhere them to the film.
Flip over and add Craft Glue to the back.
Using the film, position and then adhere the images to the background.
Pop-up the bats and pumpkin using Thin Foam Dots and then adhere to the scene.


So much fun with these cuties, I think I was literally tickled pink!

I think the candy corn makes the sentiment extra adorable.

Why don't bats come in orange and yellow???

Thanks for joining me a little interactive Halloween fun!!
Drop me a comment and say hi!
SUPPLIES:
I listed the products that I have used below. Please note that these are compensated affiliate links, used at no cost to you. I really appreciate your support. All stamps used today were part of my Cheering For You maker package from Simon Says Stamp. Click on the icons below each product picture to shop with SimonSaysStamp.com.
留言