

Simon Says Stamp - One Stamp Set, Three Cute Easter Cards, Part Two
- Keisha Diann
- Feb 27
- 2 min read

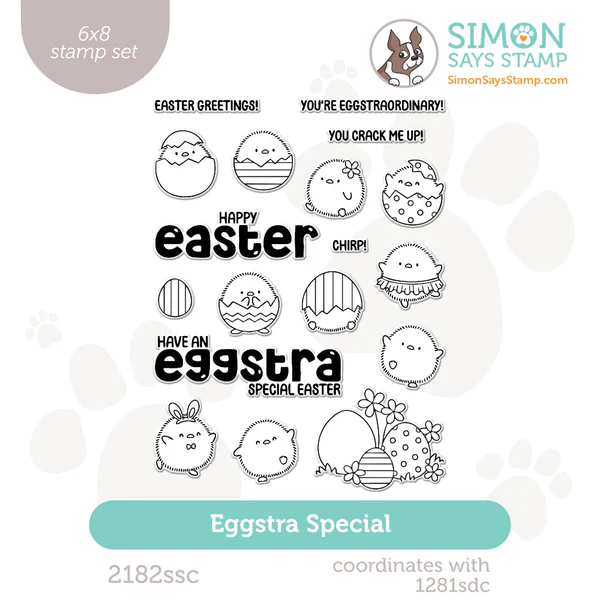
Hello Lovelies! I'm back with the second card from the Eggstra Special set! I don't think I've ever made so many Easter card designs before, but I can't help it, especially with these chicks! It's so easy to love them and today we'll use a very special chick, a trio of eggs and create a rainbow road for our chick to explore.
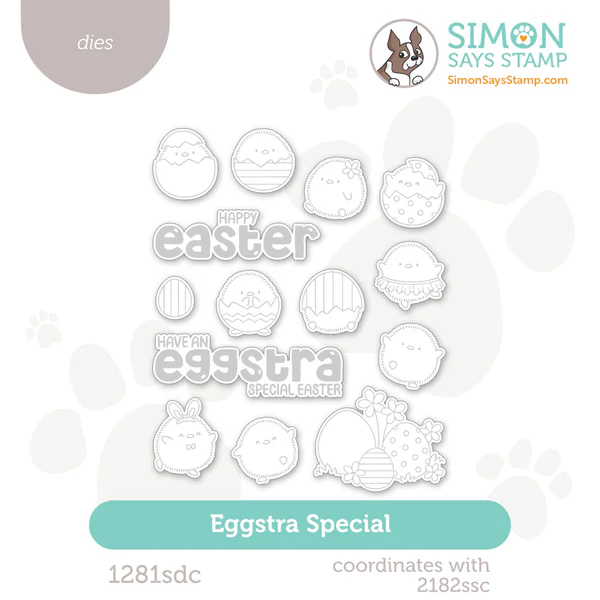
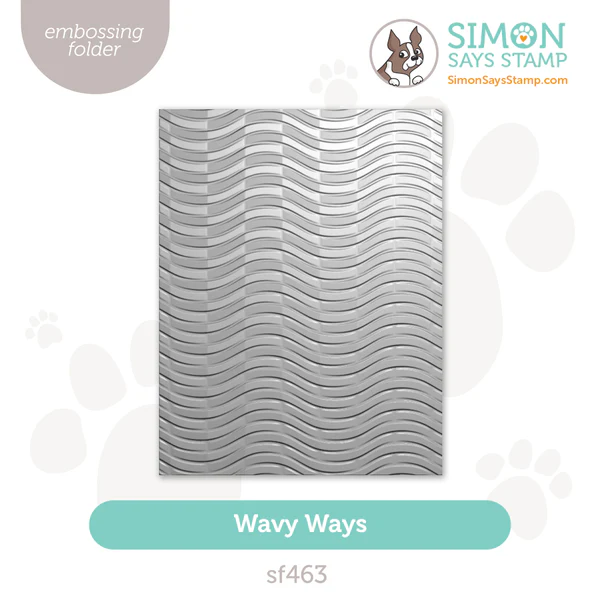
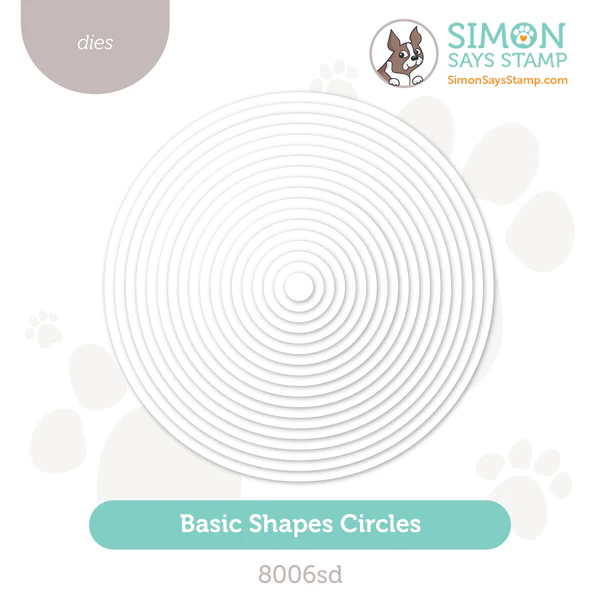
The new Basic Circle dies, Wavy Ways Embossing Folder, also from the Simon Says Stamp's Favorite Things Release help make our cute Easter cards even more adorable!

Supplies For 3 Cute Easter Cards!
Get Your Supplies!
Click on the image below to SHOP THE ENTIRE release OR
SHOP the Supplies section at the bottom of this post

Today's GIF!
This kitty is VERY unbothered about all this attention...
Like this card and my CORNY GIFs? CLICK BUTTON BELOW
to sign up for blog updates:
HAVE AN EGGSTRA SPECIAL EASTER CARD - Stamping, Alcohol Ink Coloring and Die-cutting
Card Size: 4 1/4" x 5 1/2"

Color Palette
Ohuhu Marker Colors - CG II 00, E030, YR4, Y040, Y3, G130, GY1, G8, G320, BG4, B110, PB1, V330, R24, V150, RV130
OR
COPIC Marker Colors - N1, YR01, E95, Y13, Y00, YG05, G40, G05, G0000, BG000, B02, B21, V22, BV02, V12, RV00

PROJECT HIGHLIGHTS
IF YOU'VE ALREADY MADE THE CARD FROM PART ONE YOU CAN SKIP THE NEXT 5 STEPS:
Stamp the images from the Eggstra Special stamp set on a 5 1/2" x 8 1/2" sheet of white cardstock using Tsukineko Memento Tuxedo Black Ink.
Using the selected ink marker colors, color the chicks and their eggs/accessories.
Die-cut the stamped images using the matching Eggstra Special Dies.


Secure the matching dies in place with your preferred low-tack tape (like painter's tape or washi).

Save the die-cuts for the 3 cards in this series, we will only use 2 now.

Die-cut white cardstock using the Basic Shapes Circles; Nest and tape 4 circle dies together to create circle frames. Color each frame: pink, orange, yellow and green with an alcohol ink marker.

Stamp the sentiment in Flannel and die-cut. Emboss the front flap of a Mint Card Base with the Wavy Ways Embossing Folder and arrange the diecuts as shown on the finished card, adhere with Craft Glue and Foam Squares.


I hope this makes you as I as I was making it! Happy Crafting!!!

Thanks so much for stopping by! Drop me a comment and say hi!
SUPPLIES:
I listed the products that I have used below. Please note that these are compensated affiliate links, used at no cost to you. I really appreciate your support. All stamps used today were part of my Favorite Things maker package from Simon Says Stamp. Click on the icons below each product picture to shop with SimonSaysStamp.com.
留言