Simon Says Stamp - September 2021 Card Kit, Sunshine Flowers
- Keisha Diann
- Aug 30, 2021
- 3 min read

August flew by and was full of crafty surprises for me. Most were awesome surprises, but after I gave my card kit an unexpected bath, I ruined the gorgeous floral cardstock!!!
So I decided to try something new with the stunning sunflower stamp set and wanted to share what I did to explore a new medium in this post.

But first, a quick look at what you get in the kit, though I will only be focusing on one of the two stamp sets!

Did you notice that I mentioned TWO stamp sets??? Every month I am amazed how many things are included in the card kits, check out this list!
1 NEW Simon Says Stamp Sunshine Flowers 6x8 stamp set
1 NEW Simon Says Stamp Sunflower Garden 6x8 stamp set
1 NEW Simon Says Stamp Happy Birthday die set
6 unique double-sided sheets of P13 The Four Seasons Summer 6x6 paper
1 NEW Simon Says Stamp Craft Glue Stick
1 sheet of Tim Holtz Idea-ology Sentiments Label Stickers
1 pack of Tim Holtz Idea-ology Rose Design Tape containing 8 unique rolls of washi.
1 tube of Brass, Copper, or Rose Gold Ranger Liquid Pearls (color varies in each kit)
One 8.5 x 11 inch sheet of Neenah Solar White 110lb. cardstock
One 8.5 x 11 inch sheet of Simon Says Stamp Doll Pink cardstock
One 8.5 x 11 inch sheet of Simon Says Stamp Green Leaf cardstock
One 8.5 x 11 inch sheet of Simon Says Stamp Sunshine cardstock
1 Simon Says Stamp A2 White envelope
1 Simon Says Stamp A2 Metallic Green Leaf envelope
1 Simon Says Stamp A2 Doll Pink envelope
So I was pretty annoyed when I gave my kit the spa treatment, but the large Sunshine Flowers Stamp set seemed like the perfect opportunity for me to try out my recently acquired Karin DecoBrush Pigment Markers.

Simon Says Stamp carries 8 different sets of these markers; 7 are grouped in sets of 12 by a color them (e.g. Nature, Passion, Pastel etc.); 1 contains 3 of those sets as a group.
I used these 2 sets (Nature and Basic) for my Sunshine Flower artwork:
I swatched them here so you can get a better look at the colors:

I had not tried paint markers before, so I was not sure how it would work out, but I took lots of pictures along the way so you can experiment as well.

Another quick thing I need to mention, after resisting the Make Art Station for months, I caved and treated myself to one and it is my new best friend! It's a metal mat with four strong magnets that mean business when it comes to holding down a project.
It's AWESOME for stenciling and aligning, but is perfect for holding a project flat and in place when you are fiddling with it, and I did a lot of fiddling here!

Hello Friend Card - Embossed Shaker Card with Copic Colored Focal Point
Size: 5" x 7"
Featuring:
Additional supplies linked in the Supplies Gallery at the end of this post

EMBOSSING THE IMAGE:
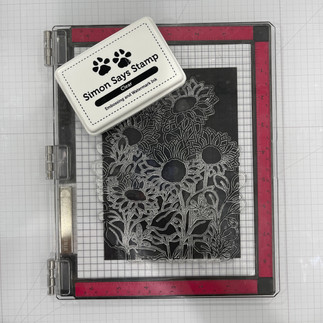
Stamp Sunflower Garden image in Clear Ink on Black Alcohol Ink Cardstock
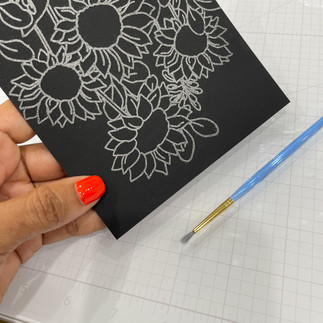
Dust with Clear Embossing Powder, if you get powder where it should not be, dust off with a small paintbrush
Heat set the powder to melt it
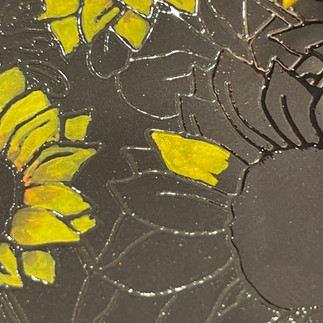
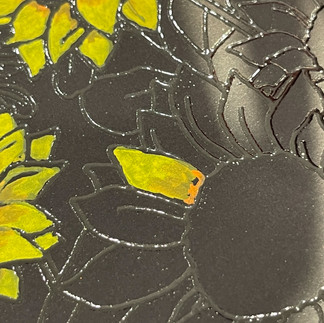
PAINTING THE SUNFLOWERS
COLORING THE SUNFLOWER PETALS
COLORING THE FLOWER CENTERS
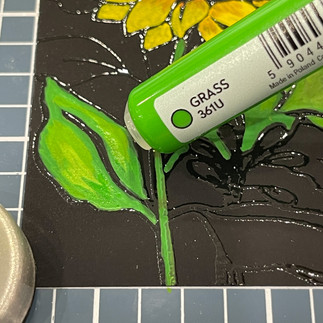
COLORING THE STEMS AND LEAVES
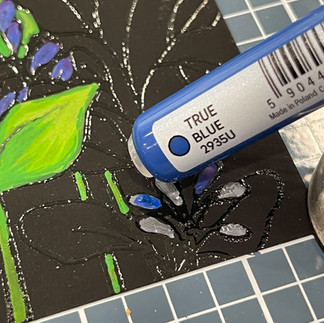
COLORING THE BLUE SPRIGS
(Ignore the white marker in the last picture, I just wanted to show you the finished sprig)
It was a big decision to decide whether to splatter my "painting" with white ink, but with a little help for my Insta-friends (I took a vote), I went for it using some Picket Fence Distress Spray Stain. Here's a closer look at how it all comes together:

FINISHING THE CARD
I salvaged the Tim Holtz Idea-ology Sentiments Label Stickers and got some Sunshine Yellow Cardstock from my own stash to make the card base and layer the stickers.

Honestly, this took me a few hours one morning, I am truly a slow crafter, but even more so when I am trying something new! However, I have absolutely no regrets and I'm looking forward to what I can "paint" next!!!

Have you used paint markers before? Let me know in the comments and share tips please!
Full supply list below for your shopping convenience.
See you soon Lovelies!
SUPPLIES:
I listed the products that I have used below. Please note that these are compensated affiliate links used at no cost to you. I really appreciate your support. Simon Says Stamps Card Kit products were provided as part of my Design Team package. Click on the icons below each product picture to shop with SimonSaysStamp.com.
















Commentaires