Hi Lovelies!
Welcome to Simon Says Stamp's STAMPtember® 2022 Release Blog Party! With so many fabulous choices, it was super hard to choose what to use for my blog party project and I surprised myself by going for a simple stencil as sassy stamp set!
The Fall vibes are strong with this card and I am deliberately going for earthy neutrals and textures that don't usually get as much "air time" in my craft room! I hope you like the result and do be sure to visit the Simon Says Stamp Blog to check out all the other STAMPtember Blog Party projects!

Let's review the key supplies for today's card. NOTE: STAMPtember release items are linked in the "Featuring" section below of the card description and here in the Supplies Section at the end of this post.
For the ink-brayering, we will use 3 earthy neutral Distress Oxides:
When you figure out which items you need to shop for, remember to use the LXDTT2FX code when you check out to snag the Picnic Floral Sentiments Stamp Set FREE with ANY $30 or more purchase! This promotion will expire on 9/4 at 11:59 pm EDT or while supplies last.
Today's GIF!
I brought some extra dots, just in case we run out...:-)
Like this card and my corny GIFs? CLICK BUTTON BELOW
to sign up for blog updates:
GIVE THANKS CARD - Ink-brayering, Stenciling and Die-cutting
A2 Card Base: 4 1/4" x 5 1/2"
Stenciled Layer: 4" x 5 1/4"
Featuring:
Simon Says Stamp Pawsitively Perfect WHITE FOAM TAPE 13 Ft Roll
Simon Says Stamp WHITE A2 SIDE FOLD Scored Cards 120# 10 Pack
Tim Holtz Distress Oxide Ink Pads - Hickory Smoke, Old Paper and Brushed Corduroy

INK BLENDING

Cut a 6" x 6" piece of 110lb white cardstock.

Roll the small brayer over the surface of the pad to transfer ink to the "roller".
Roll the brayer over the cardstock as shown to apply each ink color to the cardstock.
STENCILING

Place inked cardstock on a piece of scrap paper before placing it on your crafting surface.
Tip: I will be using a Wendy Vecchi Stay-tion to hold the stencil in place.

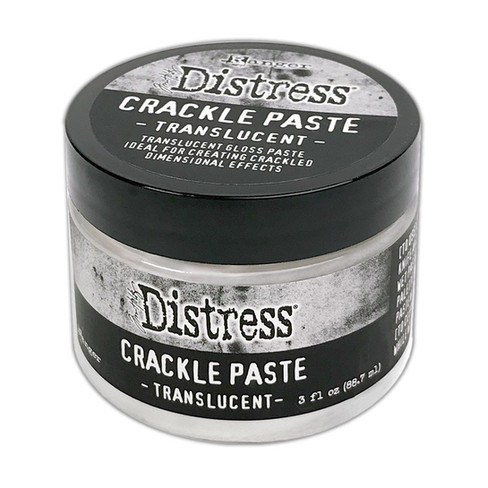
Using a palette knife, apply a layer of Translucent Crackle Paste through the openings in the stencil to create a dot pattern.

Once dry, trim to size for the card front.
DIE-CUTTING AND STAMPING

Die-cut 4 Buckeye Leaves: 1 matte gold, 1 matte silver and 2 white
Add a drop of Picket Fence Distress Paint to your craft mat, spritz with water and mix with the Distress Splatter brush. Use the splatter bush to add droplets of the white paint to the die-cuts in a random splatter. Once dry, adhere each in a slightly offset fashion to the white die-cuts.
Adhere foam strips to the and foamsquares to the leaves as shown
Stamp the sentiment in Brushed Corduroy Oxide onto white cardstock and then die-cut.
ASSEMBLY
Pop-up the stenciled panel with foam tape and adhere to the white card base as shown.
Remove the protective backing from the foam tape and adhere to the card background.
Apply Simon Says Stamp Craft Tacky Blue to the die-cut sentiment and adhere to the card base.
Feast your eyes on that yummy crackle!

The metallic leaves give the card just a touch of fancy!

I only used to non-sassy part of this sentiment of this card, but the set has so many snarky options that I will definitely come back for more!

I hope you can see why it is hard for me to resist a rainbow!

This is such an easy and fun card that I hope you will be tempted to give his a try in your favorite color palette!

This was a bit different from my usual bright colors but I'm hoping you liked it anyway. I want to make sure that you get the most of today's blog hop, so please take note Lovelies:
Be sure to explore the AMAZING Gallery that is packed with inspiration from this release!!!
Please use the LXDTT2FX code when you check out to snag the Picnic Floral Sentiments FREE with ANY $30 or more purchase! This promotion will expire on 9/4 at 11:59 pm EDT or while supplies last.
Check out the full supply list below for your shopping convenience
I'd love to hear from you in the comments so do drop me a note!
Thanks again for stopping by and I hope to see you again soon Lovelies!
SUPPLIES:
I listed the products that I have used below. Please note that these are compensated affiliate links used at no cost to you. I really appreciate your support. Simon Says Stamps STAMPtember Release products were provided as part of my Design Team package. Click on the icons below each product picture to shop with SimonSaysStamp.com.
STAMPtember Supplies:
Other Supples:


Stunning card - thank you for the inspiration!
This card is so awesome! I could not tell what techniques were used - at first I thought foiling , then embossing - lo & behold crackle!! So very nice Keisha, Bravo! Denise
I just love the background and what you did with the crackle paste!
Thank you for sharing all your hard work!
I really like your step-by-step layout :)