


Hello Lovelies! I've given into the PINK for this Sweet Treats (pun intended) Valentine's Day Card! I'm tempering it with some of Simon Says Stamp's newest neutrals.
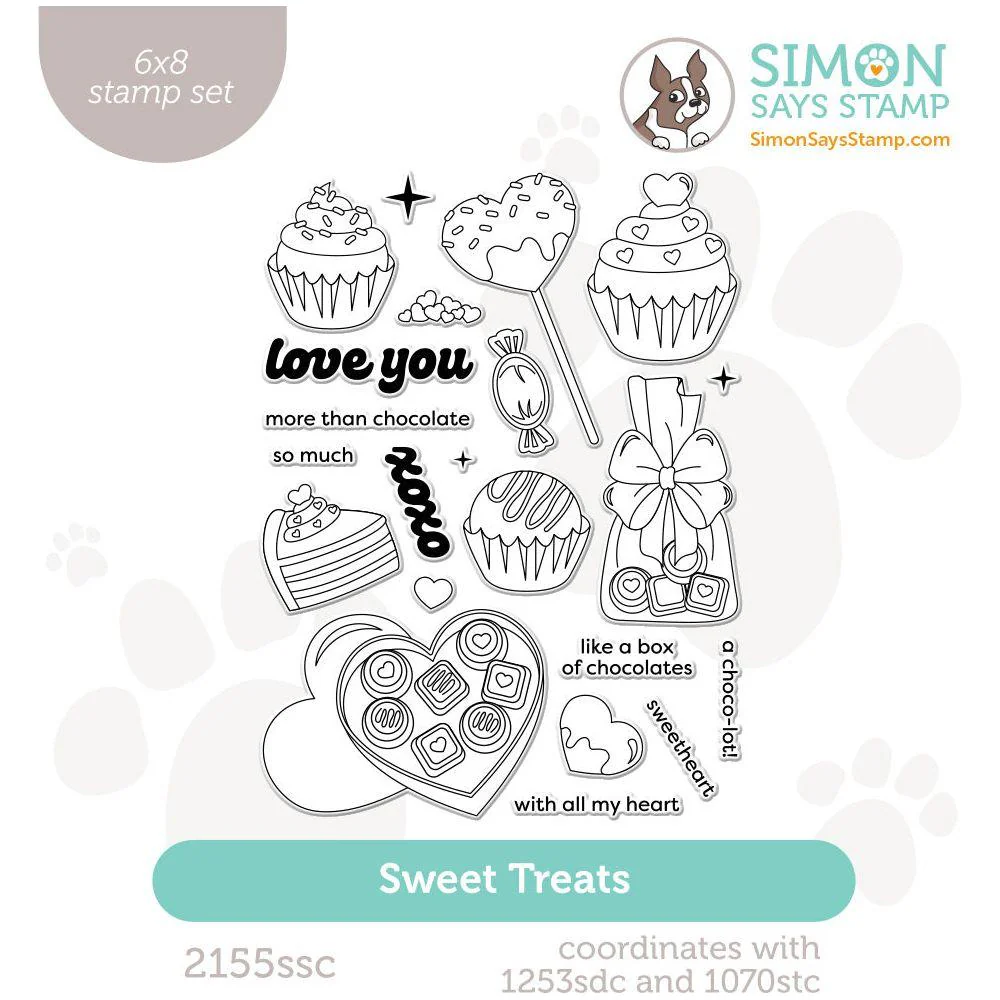
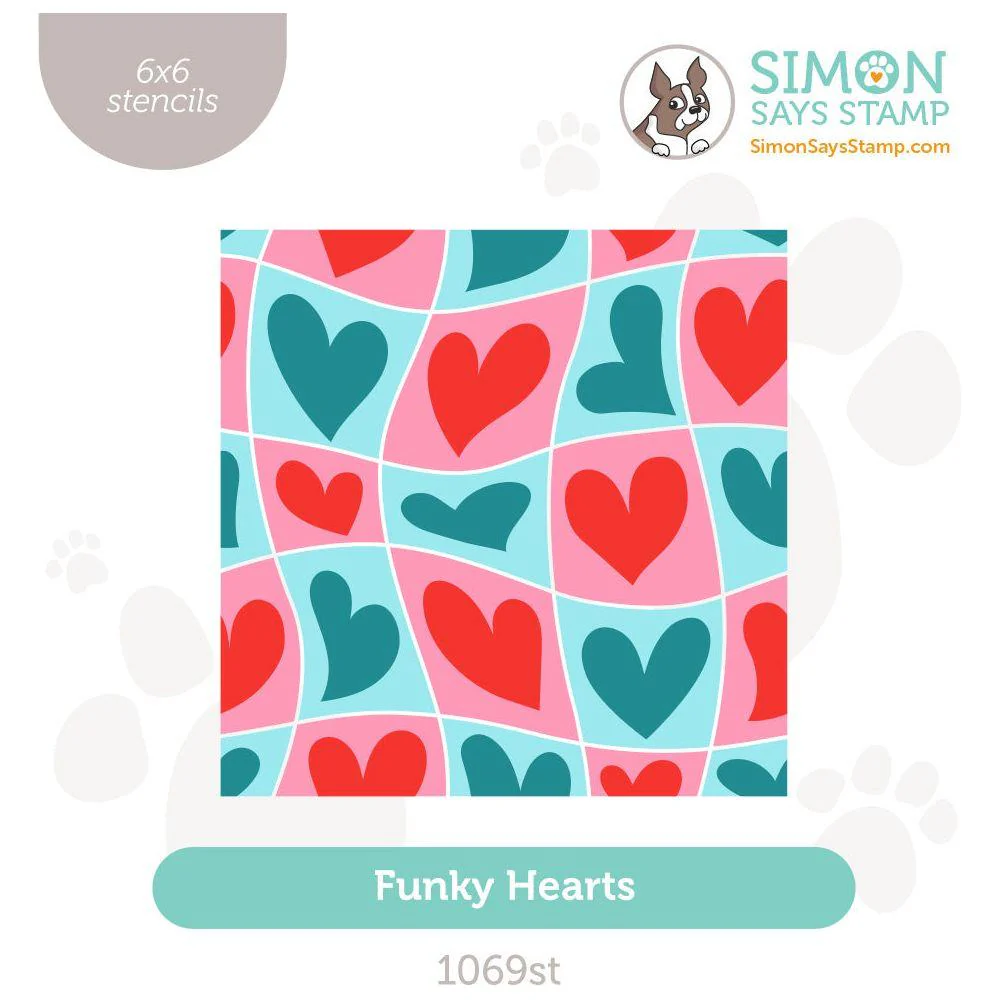
The Sweet Treats Stamp Set also has matching stencils and dies, but today we will just use the stamp and die sets and pair them with the groovy Funky Hearts Stencil Set.

Time for Key Supplies!


Get Your Supplies!
Click on the image below to SHOP THE ENTIRE release OR
SHOP the Supplies section at the bottom of this post

Today's GIF!
Yes please!
Like this card and my CORNY GIFs? CLICK BUTTON BELOW
to sign up for blog updates:
SWEET TREATS VALENTINE'S CARD - Stamping, Coloring, Stenciling and Die-cutting
Card Size: 4 1/4" x 5 1/2"

COLOR PALETTE
Simon Says Stamp Pawsitively Saturated Ink Pads - Carnation, Peony, Cookie and Gingerbread
Copic Markers - RV02, RV62, RV04, RV06, RV09, E59, E57, E55, E50, C1, C2


Stencil Color Layer Guide
Top Left Stencil - Carnation
Bottom Right Stencil - Peony
Top Right Stencil - Cookie
Bottom Left Stencil - Gingerbread
PROJECT HIGHLIGHTS
From the Sweet Treats Stamp Set, stamp the "Love you" sentiment in Nocturne and the "more than chocolate" sentiment in Gingerbread.
Stamp a piece of white cardstock with the cupcake and chocolate confection images from the Sweet Treats Stamp Set using Memento Tuxedo Black Ink.
Color the images using the selected alcohol ink markers and then die-cut using the match Sweet Treats dies
Press a 4 " x 5 1/4" piece of white cardstock onto a Craft Tacky Mat to hold in place and cover with the 1st stencil Funky Hearts Stencil of your choosing.
Use the stencil guide above to choose the ink colors for each layer of the stencil, until the background is complete.
Die-cut the hearts (from the Sweethearts Box die set) out of Pink Glitter Cardstock.
Use Craft Glue and Foam Tape adhere the die-cuts and sentiments to the a white card base as shown.


I LOVE this stencil, and I often mess up my aligment of layered stencils, but this one was NO problem at all, even with those thin white borders!

Almost good enough to eat I think!

Those pink glitter hearts are just YUMMY!!!

Happy Valentine's Day!!!

Thanks so much for stopping by! Drop me a comment and say hi!
SUPPLIES:
I listed the products that I have used below. Please note that these are compensated affiliate links, used at no cost to you. I really appreciate your support. All stamps used today were part of my To Love and To Be Loved maker packages from Simon Says Stamp. Click on the icons below each product picture to shop with SimonSaysStamp.com.
Comentarios